How to add frames to the Previaly virtual try-on
Step by step with the real screens: frame details, storefront photos, AI Studio, the try-on's 2D model, fitting on the face and publishing.
Key takeaways
- It takes two steps in the dashboard: frame details (name, price, code and sizes) and photos and try-on.
- The system warns you if the code is already in use and if the frame already has a ready-made 2D model on the platform.
- No professional photo? The AI Studio creates catalog photos from your phone photo.
- The try-on's 2D model comes from the front photo for 1 credit; lenses are detected automatically.
Before you start
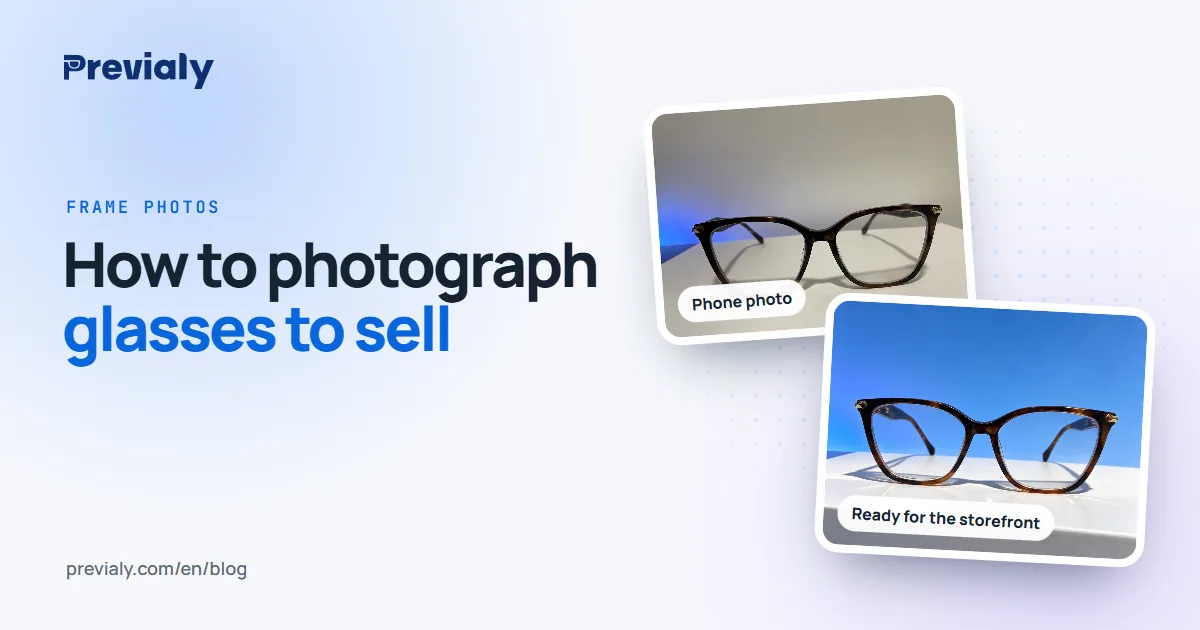
You'll need the frame in hand (to read the sizes on the temple) and a front photo of it — a phone photo is fine. If you haven't taken it yet, see how to photograph glasses to sell.
Adding a frame takes two steps: frame details, then photos and try-on. The screens below are from the Previaly dashboard on a phone. The dashboard is in Portuguese for now, so we name each button as it appears on screen.
Step 1: frame details
Tap "+ Óculos"
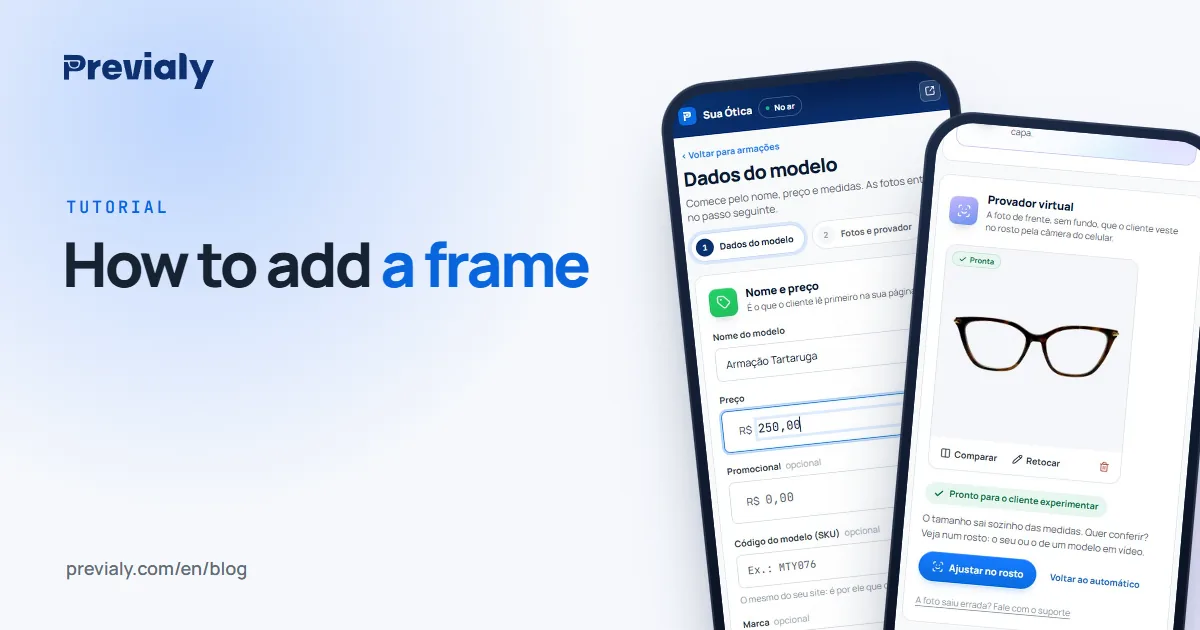
On the frames screen (Armações), tap + Óculos. The first step opens, with name and price at the top.
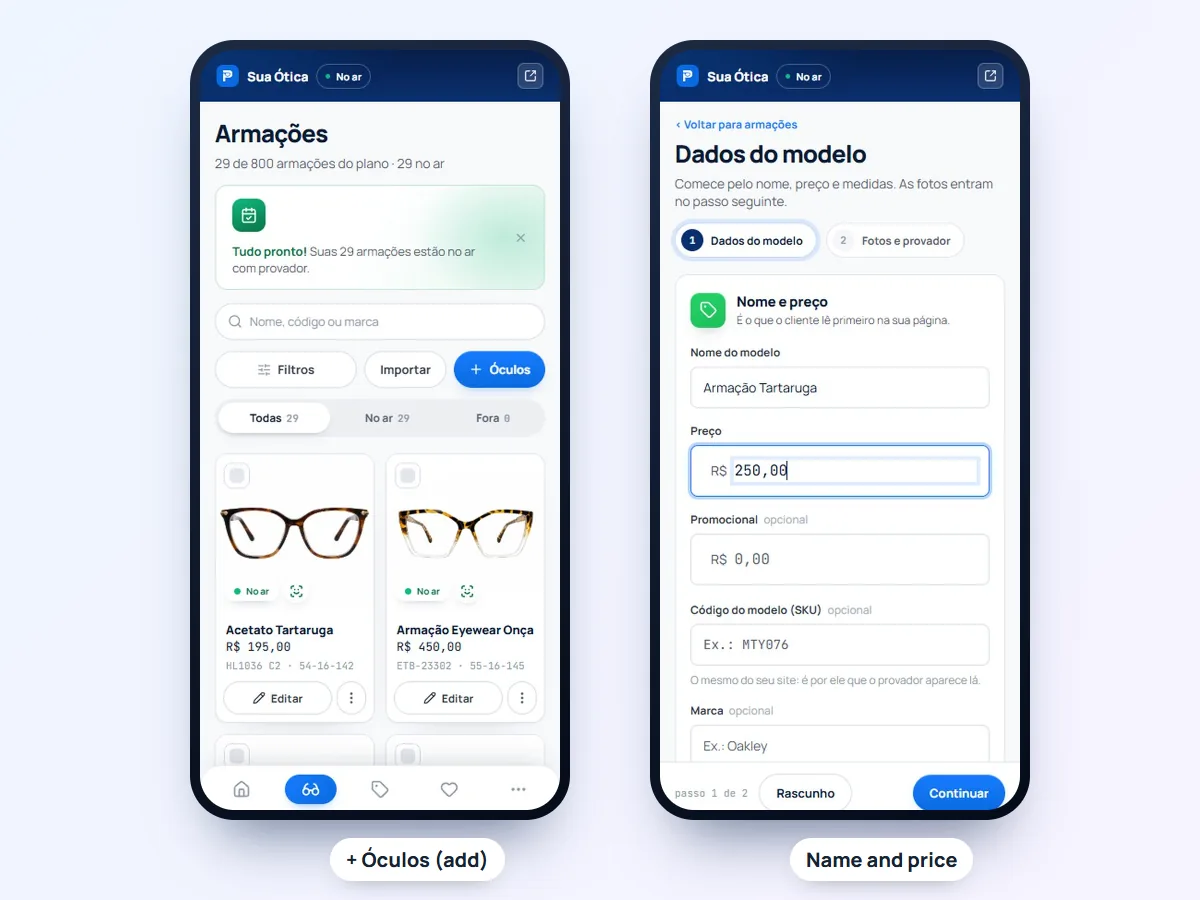
Name and price
Write the name the way customers will read it in your storefront and add the price. If there's a sale price, it goes in the field below and the storefront shows the full price crossed out.
Code and sizes
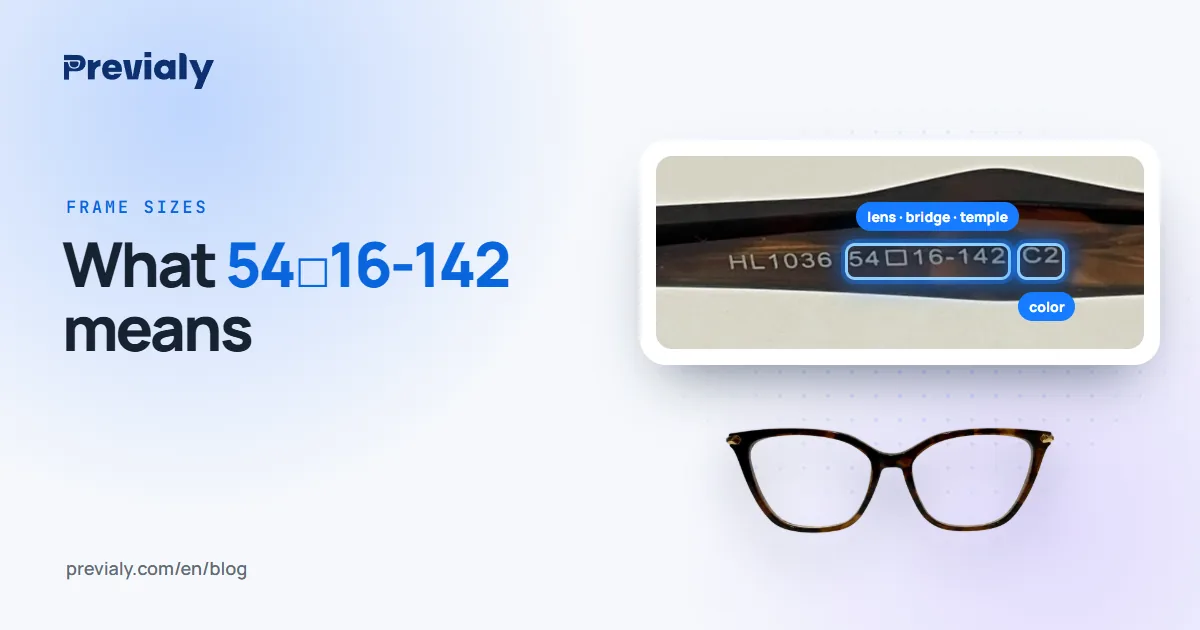
The model code and the sizes are on the inside of the temple. Use the full code, including the ending: in a code like HL1036 C2, the C2 is the color. Not sure how to read the numbers? See what 54□16-142 means.
When you type the code, the dashboard checks two things:
- if you've already added a frame with the same code, it warns you (tick "Cadastrar mesmo assim" — add anyway — if it's a different piece);
- if the frame already has a ready-made 2D model on the platform, it tells you so — you use the existing one and don't spend a credit.
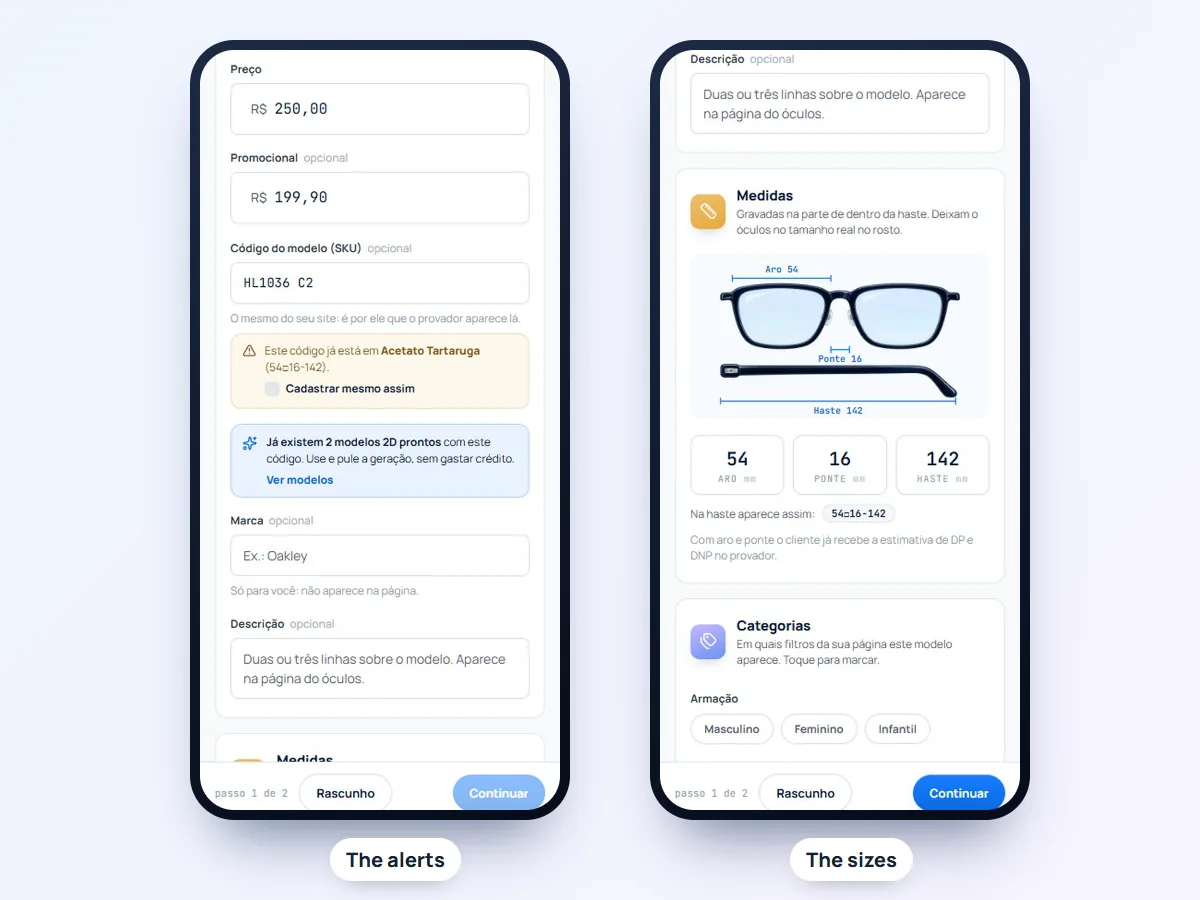
Brand, description and categories are optional. Tap Continuar (continue).
Step 2: photos and try-on
Storefront photos
Already have a professional photo of the frame? Add it under Fotos da vitrine (storefront photos) — the first one becomes the cover shown in your page's list. You can add up to 8 photos.
Don't have one? No problem: the AI Studio (Estúdio de IA) creates catalog photos from your phone photo. You upload the front photo (and the side one, if you like), pick a scene and choose which photos you want. The finished photos go straight to your storefront.
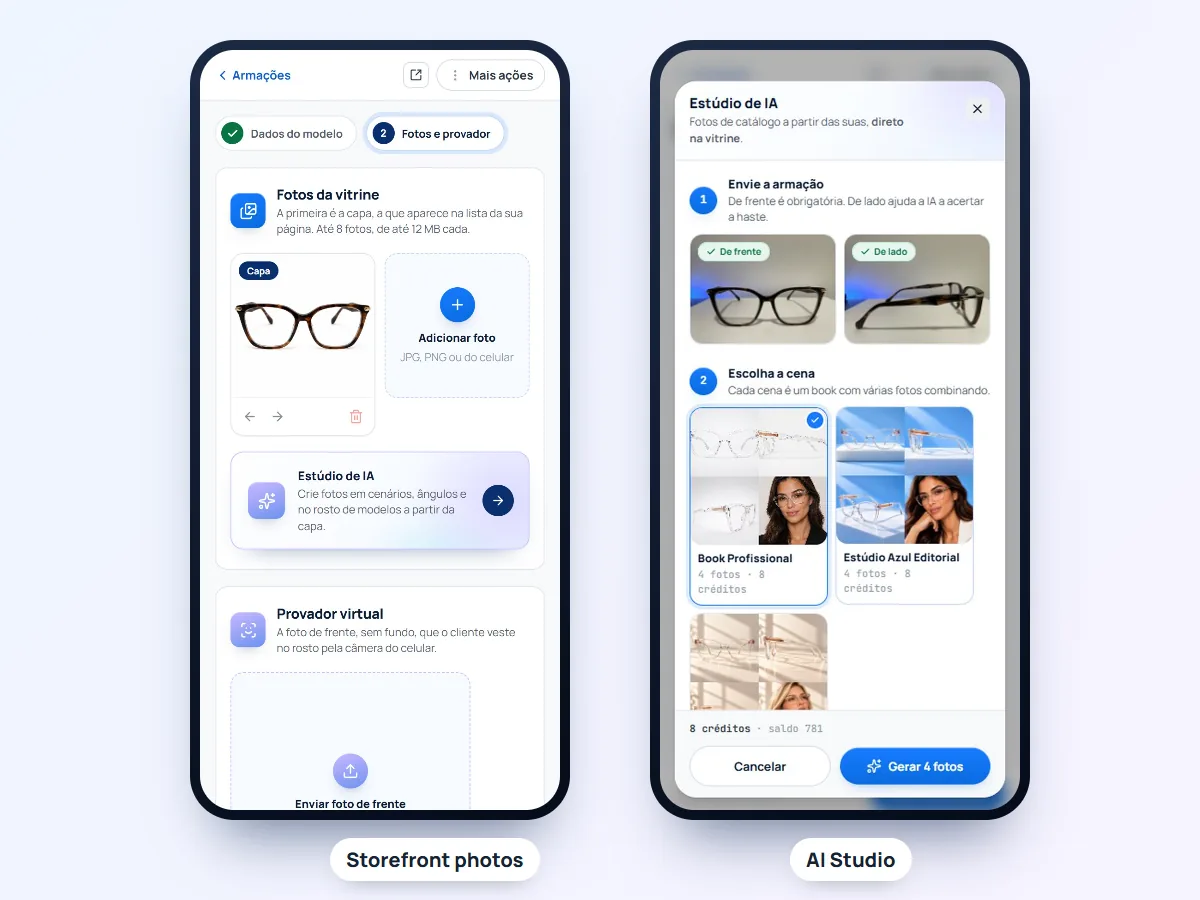
The try-on: generating the 2D model
In the Provador virtual (virtual try-on) block, upload the same front photo and tap Gerar modelo 2D com IA — generate 2D model with AI (1 credit). The AI removes the background and the temples and gets the front of the frame ready for the face. If your photo is already straight on, with no background and no temples, choose Já é um modelo 2D (it's already a 2D model).
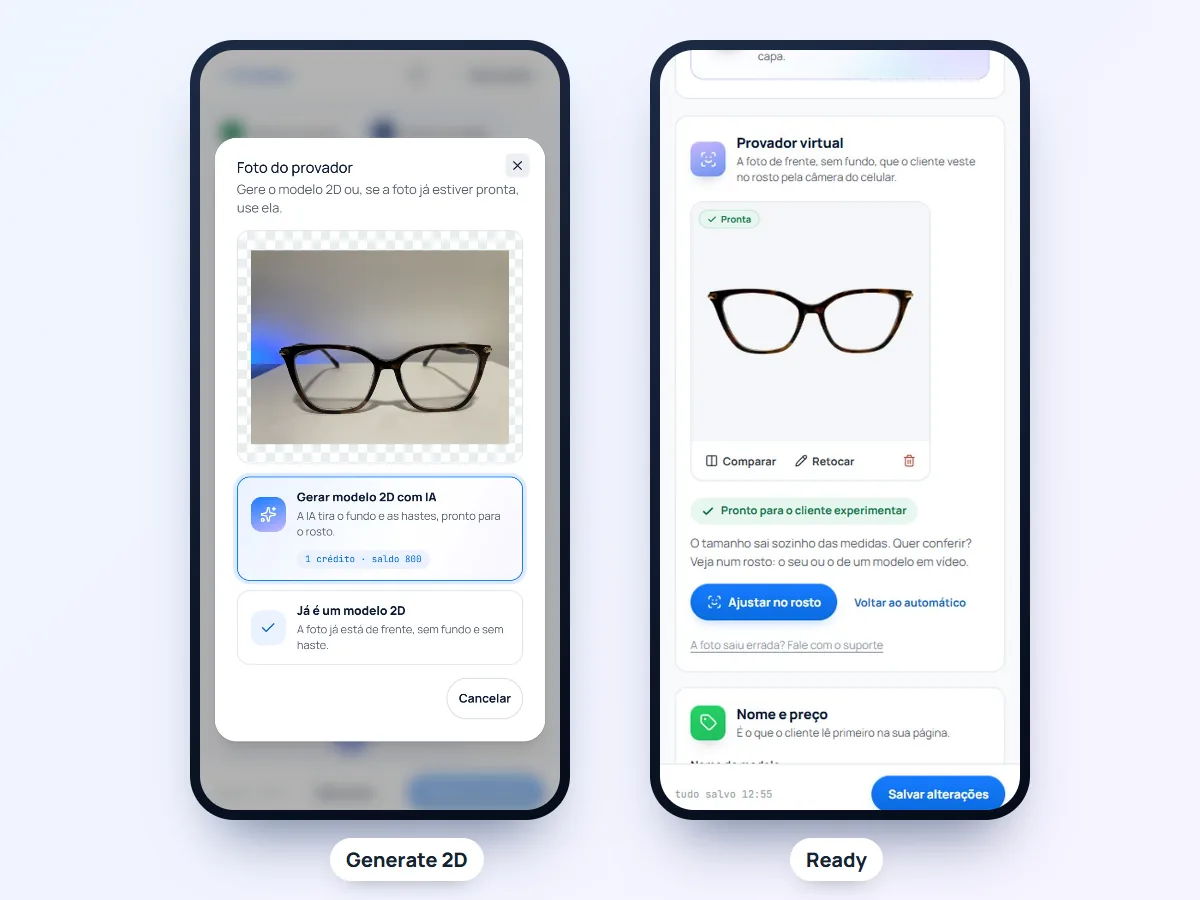
Step 3: fitting it on the face
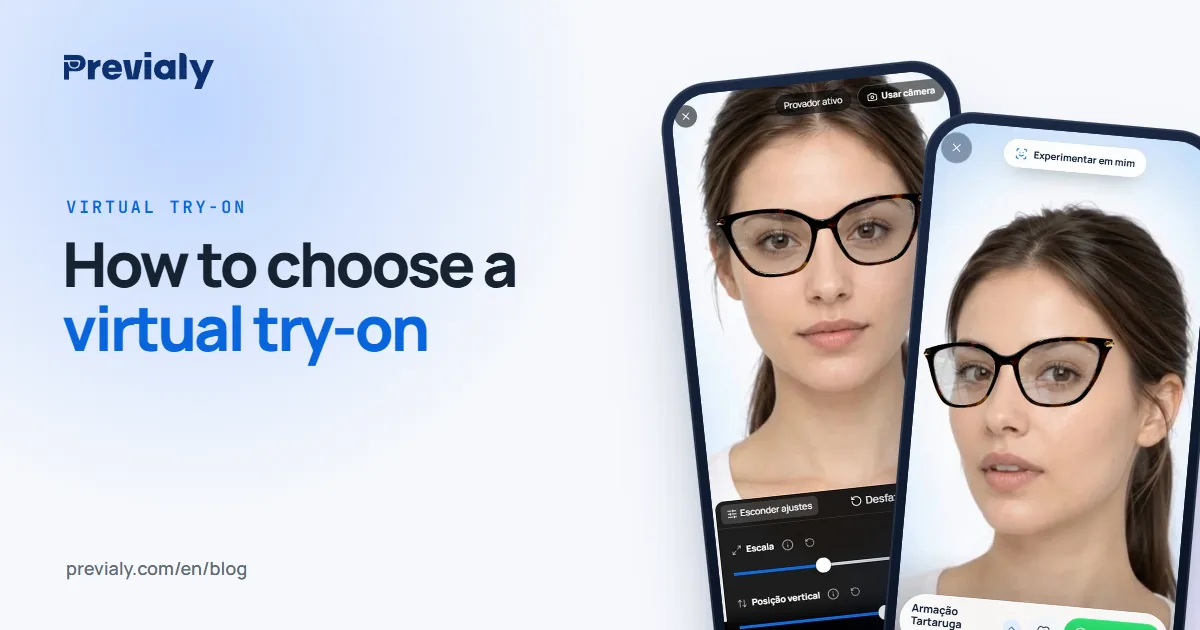
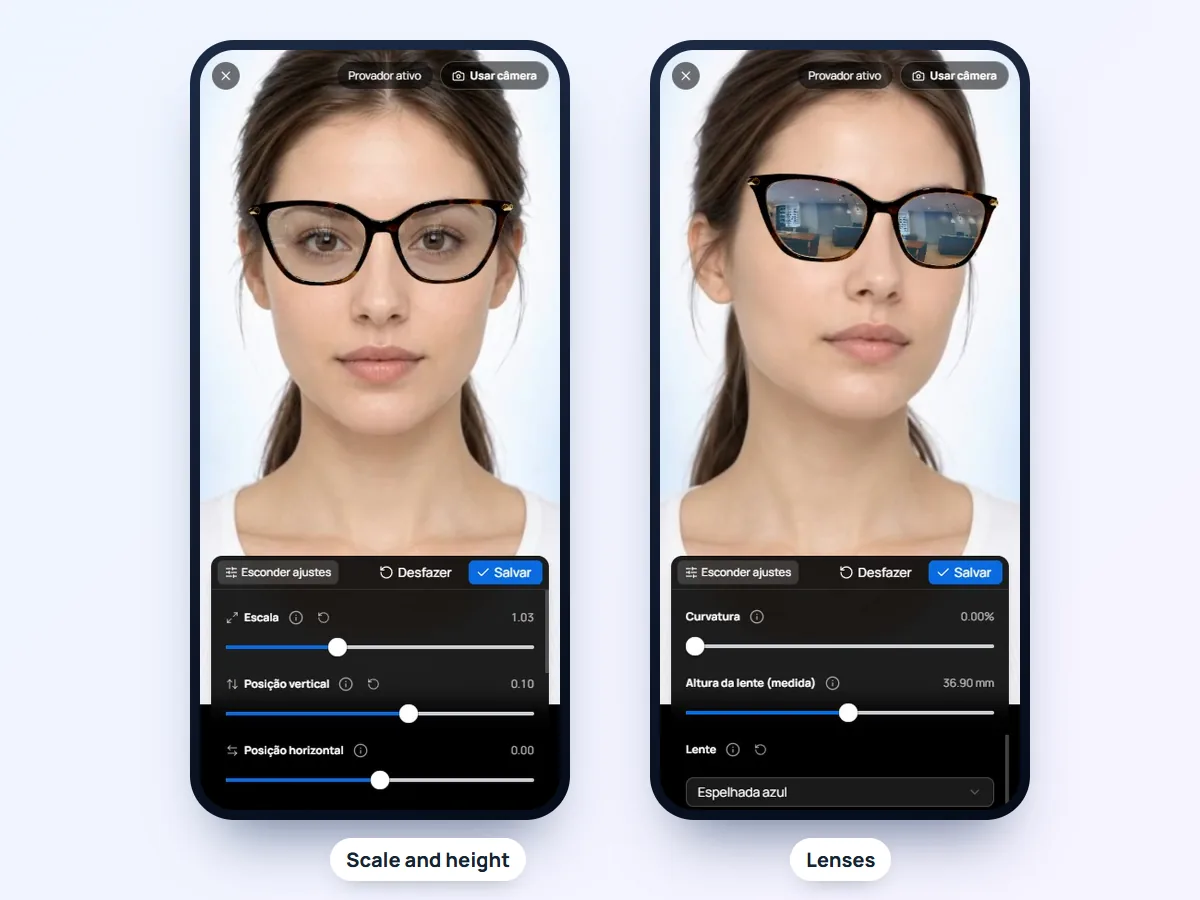
The size on the face comes automatically from the frame's measurements. If you want to check it, tap Ajustar no rosto (fit on face) and choose the video model (a sample face) or your own camera. Scale sets the size; vertical position sets the height on the face.
And the lenses? Don't worry: the system detects from the photo whether the lens is clear or tinted. You only change it if you want to.
Step 4: publish
Tap Publicar na vitrine (publish to storefront). That's it: the frame is live, and customers try it on with their phone camera, from anywhere, at any time. To spread the word, see how to sell glasses on WhatsApp.
Frequently asked questions
How much does it cost to add a frame to the try-on?
Adding the frame costs nothing. Generating its 2D model uses 1 credit from your plan, and AI Studio photos show their cost before generating. Trying on never uses credits.
Do I need professional photos?
No. A front photo taken with a phone works for the try-on, and the AI Studio creates the catalog photos for your storefront.
What happens if I add a code that already exists?
The dashboard tells you which frame already uses that code. If it's a different piece, tick "add anyway" and carry on.
Can I import many frames at once?
Yes. Besides adding frames one by one, the dashboard imports your catalog from a spreadsheet.
How long until the frame shows up in the storefront?
After you publish, it appears in your storefront within 30 seconds.
The Previaly team
We build the virtual try-on, the online storefront and the AI Studio that optical stores use to sell from the customer's phone. These guides come from what we see every day in the product and in our work with stores.